
Supercharging Shopify/Klaviyo with Custom Product Catalogs
Unlock a ton of use cases by supplementing Shopify's Klaviyo Integration.

The Objective: Expose rich product information like inventory levels, custom metafields, and custom images to use anywhere in Klaviyo.
The Method: Host a product feed using your Shopify theme.
Example Use Case
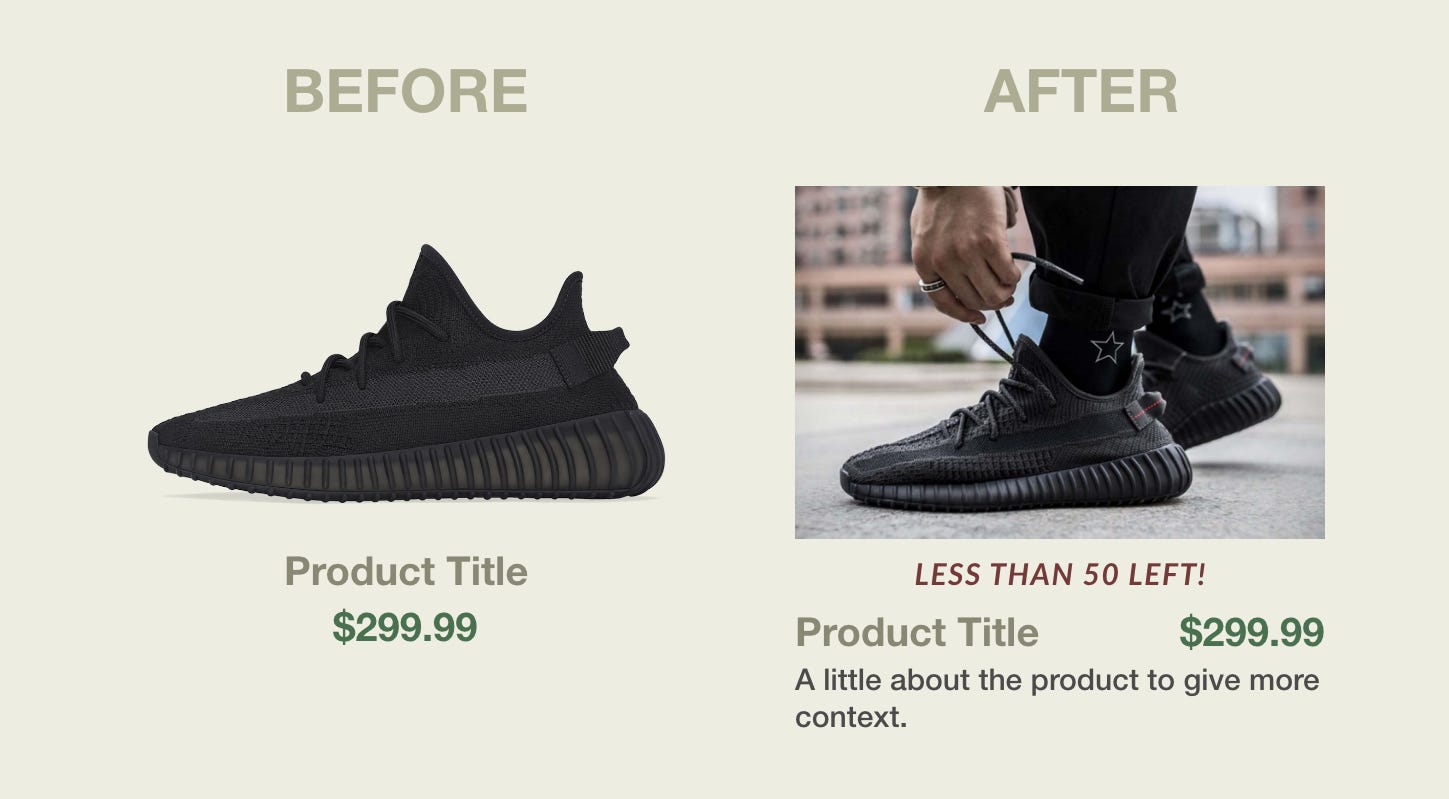
I’ll take you step by step to make the above happen, adding fields like:
Secondary Image
Inventory Level
Custom Description
This is what I’ll show, where you take it is up to your imagination.
Step 1: Make The Template
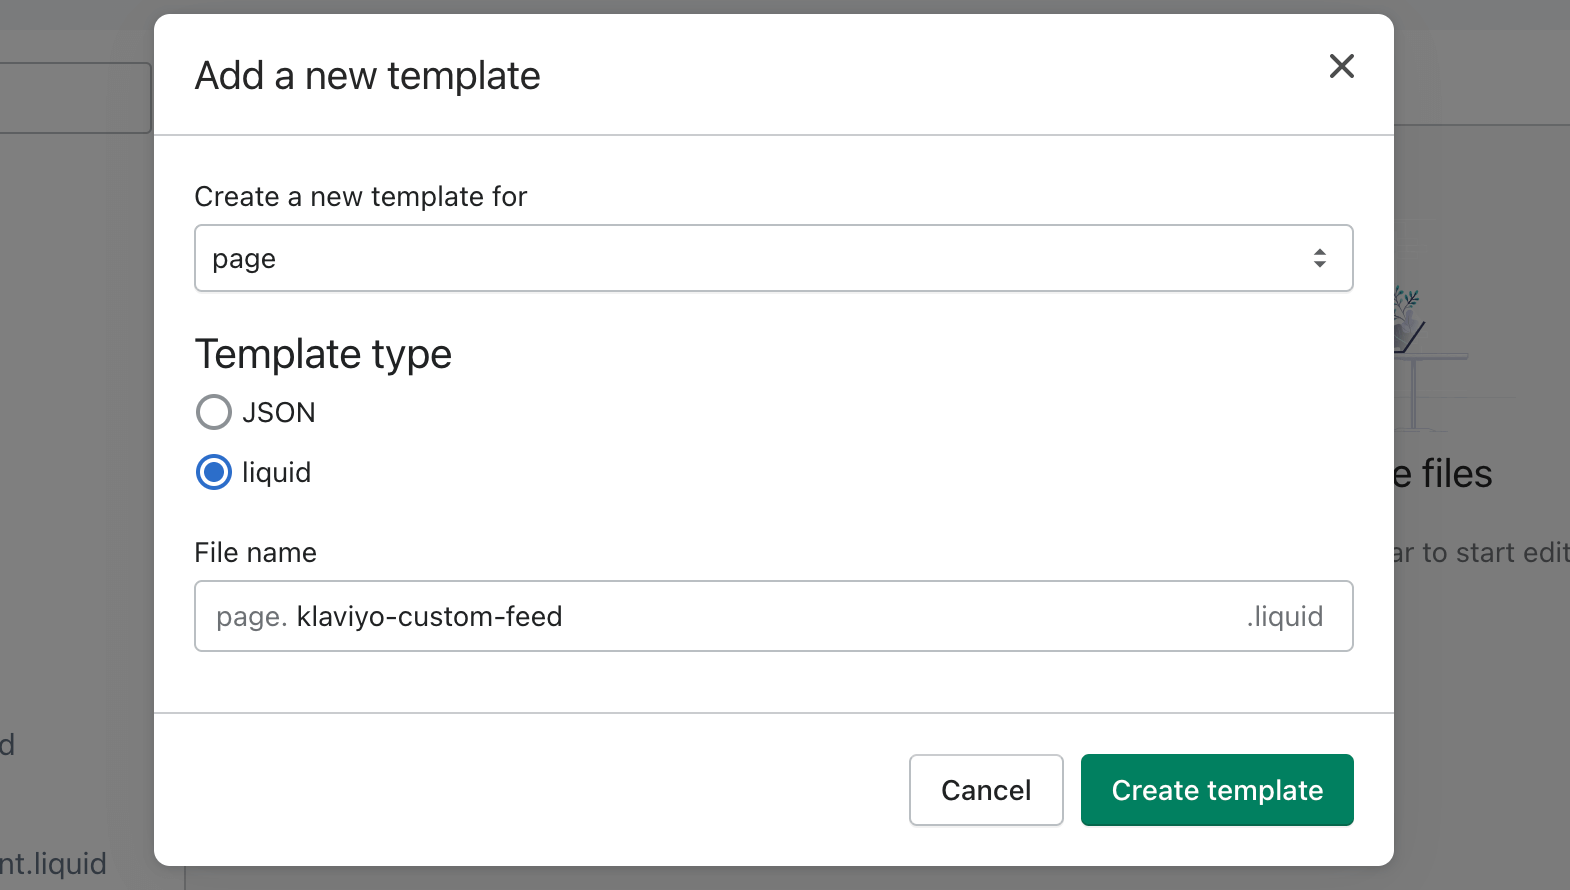
We’re going to generate the feed right in your Shopify theme.
In Shopify Admin, Go to Online Store → Themes.
On Live Theme, Click on Actions → Edit Code.
In Theme Editor, under “Templates”, Click on “Add a new template”.
In Template Creator, choose “Page”, type “Liquid”, and name it “page.klaviyo-custom-feed.liquid”, click “Create Template”.
Copy paste the code below in the editor.
Klaviyo Custom Feed Page Template
Copy paste this in your template and hit save.
I’m assuming:
You have a collection named “All” which contains all products. If not, can rename this to the “handle” of any collection you have.
You have a metafield for a custom description called product.custom_description. No problem if not, the code will fallback.
{% layout none %}
<rss version="1.0">
  <Products>
    {%- paginate collections.all.products by 1000 -%}
      {%- for product in collections.all.products -%}


       <Product>
		<id>{{product.id}}-CUSTOM</id>
		<title>{{product.title | escape | strip_html }}</title>
		<link>{{shop.url}}/products/{{product.handle}}</link>
		<image_link>https{{ product.featured_image | img_url: 'large' }}</image_link>
        <description>{{ product.description | strip_html }}</description>
        {%- assign custom_image_link = product.featured_image | image_url: 'large' -%}
        {% if product.images.size > 1 %}
    		{%- assign custom_image_link = product.images[1] | img_url: "480x480", crop: 'center' %}
    	{% endif %}
    	<custom_image_link>https:{{custom_image_link}}</custom_image_link>

        {%- assign inventory_available = 0 -%}
        {%- assign inventory_managed = false -%}
        {%- for variant in product.variants %}
        	{%- if variant.inventory_management == 'shopify' -%}
        		{%- assign inventory_managed = true -%}
        		{%- assign inventory_available = inventory_available | plus: variant.inventory_quantity -%}
        	{%- endif -%}
        {%- endfor -%}
        {%- if inventory_managed == true and inventory_available > 0 -%}
        	<inventory_avail>{{inventory_available}}</inventory_avail>
        {%- endif -%}
        {%- if product.metafields.product.custom_description -%}
        	<custom_desc>{{custom_desc}}</custom_desc>
        {%- endif -%}
       </Product>

      {%- endfor -%}
    {%- endpaginate -%}

  </Products>


</rss>
Step 2: Make The Page
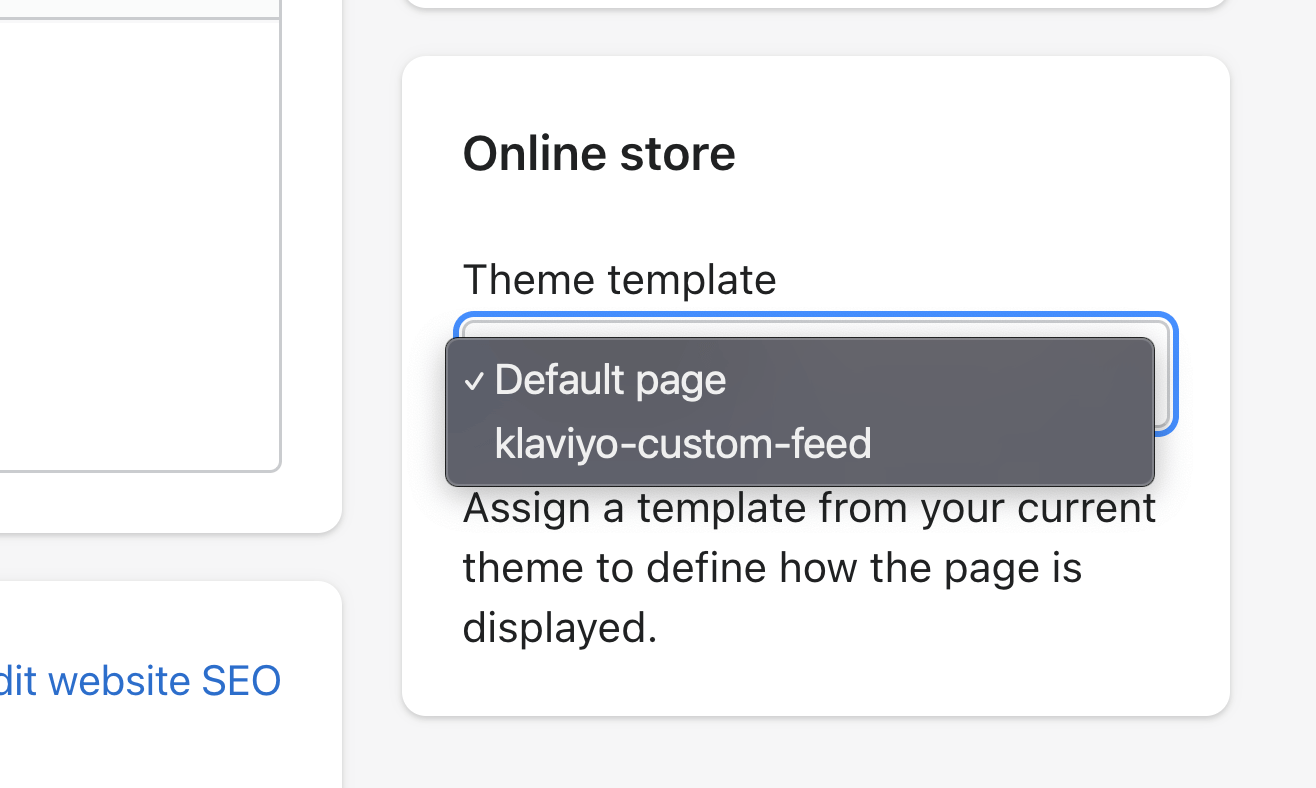
Let’s connect the feed you just made to a page.
In Shopify Admin, Go to Online Store → Pages.
Click “Add Page”.
Call it “Klaviyo Custom Feed”, or anything you want.
On the bottom right, in the Theme Template dropdown, find and pick the template name you created previously.
Save/Publish the page.
Click “View Page”.
You’ll see a wall of text, it’s not pretty but it has all the data needed to power the Klaviyo Catalog.
COPY the URL of the page you just made, we’ll use it in the next step.
Step 3: Connect Feed in Klaviyo
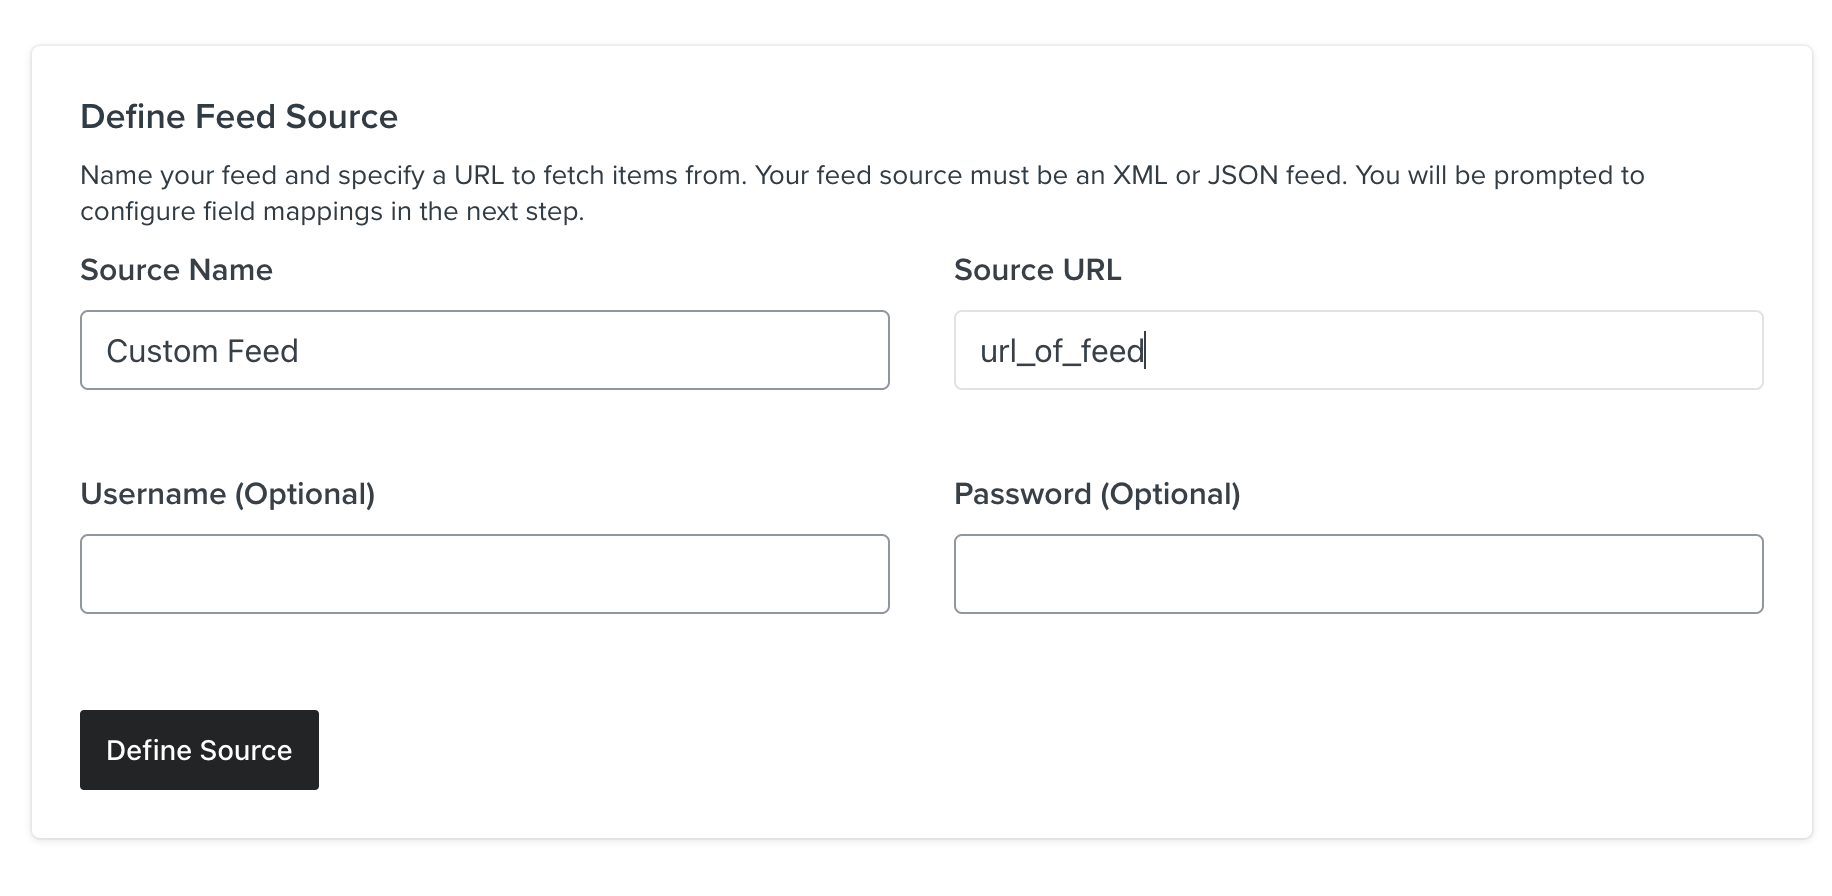
We’ll be pushing this product info to Klaviyo. Don’t worry, it won’t override any Shopify data, the IDs of these product have a suffix like this “{{shopify_product_id}}-CUSTOM”, so it’s all unique and supplementary.
In Klaviyo Admin, find “Catalog” in the main menu.
At the top right, click “Manage Custom Catalog Sources”.
Click “Add New Source”.
Name it anything you want.
Paste the URL you copied previously.
Leave username/password blank, and hit “Define Source”.
You’re all set! Depending on the size of your catalog, data will start populating in to Klaviyo.
Step 4: Use It In Klaviyo!
We’re using an abandoned cart email as an example.
The example below is for the cart event flow, but it can be altered to work for checkout as well.
In Klaviyo, navigate to your Abandoned Cart flow, the first message will do.
Paste the code below to anywhere you want to surface the data provided.
Catalog variable snippet for Abandoned Cart (you’ll need to customize for your own variables/events):
{% catalog event.ProductID|add:"-CUSTOM" %}
Title: {{ catalog_item.title }}<br>
Custom Image: {{ catalog_item.custom_image_link }}<br>
Inventory: {{ catalog_item.metadata.inventory_avail }}<br>
Custom Description: {{ catalog_item.metadata.custom_desc}}<br>
{% endcatalog %}
The above code in Klaviyo should work out of the box, but you might have empty variables for Inventory and Custom Description depending on your Shopify setup.
Consult with a dev if you’re unsure how this works, most Shopify devs will know how to work with it.
Take It To The Next Level
The above is just a starter code, the main value is the ability to add your own variables and use cases to enrich your emails & SMS wherever you’re showing off products.
Enjoy & Have Fun With It!
Useful Resources
Klaviyo Custom Catalog Documentation: https://developers.klaviyo.com/en/docs/guide-to-syncing-a-custom-catalog-feed-to-klaviyo
Poshify Utilities, for editing metafields in Chrome:
https://chrome.google.com/webstore/detail/poshify-utilities/albldpmnhhhcjiladaacehfabibgbllk?hl=en